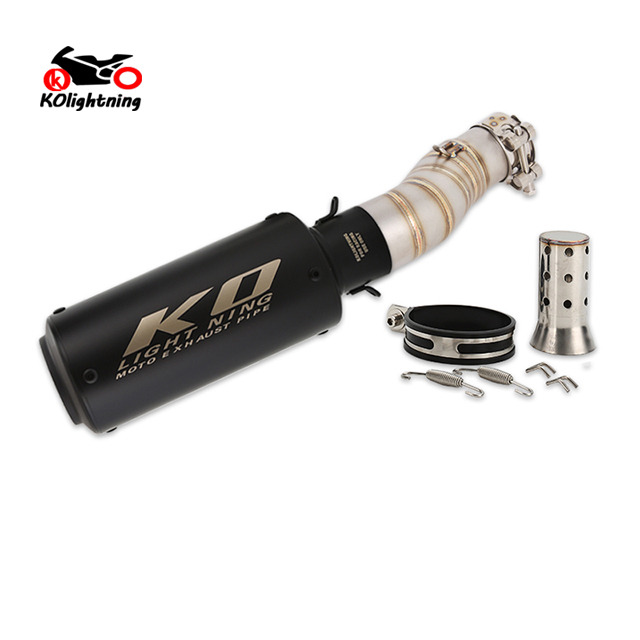
Completing an aftermarket exhaust installation only to hear the audible ticking or sputtering of a leak at the mid-pipe connection is a common mechanical frustration. Metal-to-metal slip joints rarely achieve a perfect seal on their own due to manufacturing tolerances, thermal expansion variations, and the degradation of OEM gaskets. Unresolved leaks compromise backpressure, skew O2 sensor readings, and cause deceleration popping. This guide transitions from identifying the leak to evaluating technical, permanent sealing solutions. We cover high-temp sealants and specialized clamping hardware to ensure optimal performance and longevity for your Slip-on Exhaust System.
Tolerance Mismatch is the Primary Culprit: Most leaks occur because the outer diameter of the factory header and the inner diameter of the aftermarket slip-on exhaust system have marginal dimensional discrepancies.
Sealants vs. Hardware: High-temp RTV silicone offers a flexible, heat-resistant barrier for minor gaps, while formed exhaust clamps provide superior 360-degree mechanical sealing for larger tolerance mismatches.
Gasket Degradation: Reusing a crushed or heat-cycled OEM graphite gasket is a guaranteed failure point during installation; replacement is a non-negotiable success criterion.
Engine Management Risks: Ignoring a connection joint leak introduces unmetered oxygen into the exhaust stream, potentially causing lean-running conditions and false fuel-trim adjustments.
The Mechanics of a Slip-On Exhaust System Leak
A properly sealed system means zero gas escape under load, a stable idle, and no soot accumulation. Achieving this requires understanding the physical forces acting on the connection joint. When you bolt up a new pipe, you are dealing with raw physics. The exhaust gases leaving the combustion chamber are incredibly hot and under high pressure. If the pathway isn't perfectly sealed, those gases will find the path of least resistance.
Thermal Expansion and Metal-to-Metal Tolerances
Dissimilar metals heat and expand at different rates. For instance, mating a titanium slip-on to a stainless steel header creates unequal expansion. Micro-gaps form during the heat cycle if the joint lacks a compressible sealing medium. These microscopic openings allow exhaust gases to escape under pressure. When the engine is cold, the joint might feel tight. Once the exhaust gas temperatures hit several hundred degrees, the outer pipe expands faster than the inner pipe, breaking the mechanical seal.
Mechanical Stressors, Chassis Vibration, and Physical Damage
Engine vibration and road impacts shift the exhaust alignment. Poor bracket or mounting hanger alignment puts constant structural tension on the connection joint. This tension distorts or ovalizes the round pipe mating surfaces, causing leaks. A misaligned system fights itself, eventually breaking the seal. If you have to force the muffler onto the mounting bracket, you are pre-loading the slip joint with stress.
Always leave all clamps and mounting bolts loose during the initial test fit.
Align the muffler with the chassis mounting points first.
Tighten the system from the front (header side) to the back (muffler side) to prevent binding.
The Role of Factory vs. Aftermarket Gaskets
Crush gaskets have structural limitations once torqued down initially. They deform to fill gaps. Reusing them guarantees failure. Some aftermarket manufacturers omit gaskets in favor of tight-tolerance slip fits. This engineering approach often fails in real-world applications where thermal cycling and vibration exist. A used graphite gasket has already taken the shape of the old pipe; it cannot expand to fill the voids of a new pipe.
Diagnosing the Connection Joint Leak
Identifying a leak requires looking for specific physical and auditory evidence. You don't need expensive diagnostic tools to find an exhaust leak, just a good eye and a basic understanding of what escaping exhaust gas looks and sounds like.
Visual and Auditory Indicators
Look for carbon tracking, which appears as black soot around the clamp. Condensation dripping during cold starts is another sign. Listen for a distinct chuffing or ticking noise that increases with engine RPM. These indicators confirm exhaust gases are escaping the joint. The ticking sound is often mistaken for a noisy valvetrain, but if it gets louder under heavy throttle load, it is almost certainly an exhaust leak.
Technical Verification Methods
Perform the soapy water test on a cold engine immediately after startup. Spray a mixture of dish soap and water on the joint; bubbles indicate a leak. Alternatively, use a smoke test method. Pump automotive smoke into the tailpipe to identify micro-leaks without disassembling the system. Block the exhaust tip with a rag while doing this to force the smoke out of any compromised joints.
Evaluating Sealing Solutions for Your Slip-On Exhaust System
Compare remediation methods based on longevity, ease of installation, and thermal resistance. Fixing the leak properly the first time saves you from having to tear the bike down again after a few hundred miles.
Sealing Method
Best Application
Pros
Cons
High-Temp RTV Silicone
Tight metal-to-metal slip fits
Fills micro-gaps, flexible
Requires 24-hour cure time, messy
Formed Exhaust Clamps
Pipes with expansion slots
360-degree even pressure
Can be bulky, requires clearance
Graphite Crush Gaskets
Factory-style stepped joints
Perfect physical barrier
Strictly single-use, hard to source exact sizes
High-Temp RTV Silicone (Chemical Sealing)
Copper or red high-temp RTV fills micro-abrasions and tolerance gaps. It cures into a flexible, heat-resistant seal. Smearing sealant on the outside of an already-assembled joint fails. The correct technique involves fully disconnecting the joint, cleaning with brake cleaner, applying a thin, uniform bead to the inside mating surface of the female pipe, reassembling, and clamping. This requires meticulous surface prep and strict adherence to 24-hour cure times before heat cycling.
Formed Exhaust Clamps vs. Standard T-Bolt Clamps (Mechanical Sealing)
Standard band clamps often pinch or deform the pipe. Formed exhaust clamps apply even, 360-degree pressure across both the larger slip-on side and the smaller header side. This method scales well for setups where the slip-on pipe has expansion slots that need uniform compression over the mating pipe. If you over-torque a standard narrow band clamp, you will crimp the pipe, making future removal nearly impossible.
Graphite and Crush Gaskets (Physical Barrier)
OEM-style graphite sleeves provide the most factory-correct seal by crushing into the imperfections of both pipes. They are highly effective but strictly single-use. Sourcing the exact inner and outer diameter for aftermarket pipes can be challenging, but it remains the most reliable physical barrier. Always measure the inner diameter of your new mid-pipe and the outer diameter of your header with digital calipers before ordering a replacement gasket.
Brand-Specific Fitment Realities and Tolerances
Different motorcycle brands present unique challenges when installing aftermarket exhaust components. Knowing the quirks of your specific machine prevents installation headaches.
Upgrading a CFMOTO Slip-on Exhaust
Tolerance variations often occur when mating aftermarket mid-pipes to factory CFMOTO headers. Retaining or replacing the factory graphite sleeve is necessary. Metal-to-metal clamping on a CFMOTO Slip-on Exhaust frequently results in deceleration popping. The factory headers on these bikes often have a slight taper, meaning a straight-cut aftermarket mid-pipe will struggle to seal without a compressible graphite barrier.
Securing a Kawasaki Slip-on Exhaust
Specific clamp torque specifications are required for Kawasaki models to prevent crushing the mid-pipe. A common pitfall involves removing the pre-chamber and failing to properly step down the pipe diameter. This necessitates specialized reducer sleeves to properly secure a Kawasaki Slip-on Exhaust. Many riders try to clamp down a pipe that is 2mm too large, resulting in a massive leak right at the catalytic converter delete joint.
Heavyweight dual-muffler cruiser systems face unique challenges. Minor bracket misalignment translates to significant mechanical torque on the head pipe connection. Align both mufflers parallel to the frame before tightening the heavy-duty clamps. This prevents structural strain from distorting the slip joints. The sheer weight of these mufflers means that if the rear support bracket is off by even a quarter of an inch, the front slip joint will pull apart over bumps.
Dirt Bike & Motocross Slip-Ons
Off-road riding creates harsh vibration and frame-flex. This causes silencer-to-S-pipe connections to wear and leak. Use high-temp RTV combined with heavy-duty spring-retention systems. This allows physical flex without breaking the seal. Hard-mounting a dirt bike exhaust without springs usually results in cracked header welds due to the extreme chassis flex encountered over jumps.
Implementation Risks: The Cost of Ignoring the Leak
Fixing a leak is an engine preservation mandate, not just an auditory preference. Letting it slide can lead to expensive mechanical failures down the road.
Exhaust Valve Damage and Lean Running Conditions
A leak near the header allows cold air to be sucked back into the exhaust tract during deceleration. This potentially shocks hot exhaust valves, leading to premature wear or failure. Exhaust valves operate at extreme temperatures; hitting them with a sudden rush of cold ambient air causes the metal to contract rapidly, which can lead to cracking or warping of the valve face.
False O2 Sensor Readings and Fuel Mapping Issues
Unmetered oxygen entering the slip joint travels upstream via exhaust pulses. This tricks the O2 sensor into reading a lean condition. The resulting ECU over-correction dumps excess fuel, leading to poor fuel economy, fouled spark plugs, and compromised performance. You might think your bike needs a custom tune, but in reality, it just needs a properly sealed exhaust joint.
Collateral Damage to Surrounding Components
Superheated exhaust gases escaping from a mid-pipe leak cause damage. They quickly melt nearby plastic bodywork, singe wiring harnesses, or overheat rear brake lines and shock reservoirs. A leak pointing directly at a rear shock body will heat the shock oil, causing suspension fade during aggressive riding.
Conclusion
A leaking slip-on exhaust system is a solvable mechanical mismatch. The most robust fix combines a fresh gasket or high-temp RTV paired with a high-quality formed clamp. Do not settle for a sputtering exhaust note or compromised engine performance.
Allow the exhaust system to cool entirely before attempting any repairs.
Disassemble the leaking joint and clean all mating surfaces thoroughly with brake cleaner and a wire brush.
Apply your chosen sealing method—either a new graphite gasket or a thin bead of high-temp RTV inside the female pipe.
Reassemble the system, align the brackets, and torque the formed clamp to the manufacturer's specifications.
Perform a proper heat-cycle cure, letting the bike idle up to operating temperature before riding.
FAQ
Q: Is it normal for a new slip-on exhaust system to leak?
A: No. While minor condensation weeping on a cold start is common, active exhaust gas escaping under load indicates an improper seal that requires attention.
Q: Can I use regular silicone to seal an exhaust joint?
A: Absolutely not. Standard silicone will melt and burn off immediately. Only ultra-high-temperature RTV silicone rated for exhaust applications should be used.
Q: Can I just smear RTV silicone on the outside of the leaking joint?
A: No. Applying RTV to the exterior of an assembled joint will not hold up to the internal exhaust pressure and will quickly blowout. The joint must be disassembled so the sealant can be applied inside the mating collar before reassembly.
Q: How long does exhaust sealant take to cure?
A: Most high-temp RTV sealants require a minimum of 1 hour to tack and 24 hours to fully cure before the engine should be started and subjected to heat cycles.
Q: Will an exhaust leak cause deceleration popping?
A: Yes. A leak allows fresh oxygen into the hot exhaust stream, which ignites unburnt fuel vapors during deceleration, causing a loud popping or banging sound.
Q: Do I need to remap my motorcycle for a minor slip-on leak?
A: You should fix the leak rather than remapping. The leak causes false sensor readings, so sealing the joint restores proper engine management function without the need for ECU modifications.